Monday, August 27, 2012

Wedding Gifts

I'm in a wedding at the end of September and we had the bridal shower yesterday. I gave the bride two picture frames. The first one had their wedding invitation framed inside, and the second one was inspired by THIS pin on Pinterest.
This idea was perfect because of the rustic theme of the wedding, and I used the lyrics of the song the bride will be walking down the aisle to for the tree. I backed the tree with purple paper because that is her main wedding color, and because I wanted it to pop from the background.


I am so happy with how it turned out!!!

Schedule in picture frame


There are tons of pins on Pinterest about writing on picture frames with dry erase markers. I decided that I wanted to make a week-at-a-glance type of calendar for myself using this concept. I found a frame with seven photo spots at Walmart. I already had the scrapbook paper (which I found in the $1 bins at Target) and the pre-cut letters in my scrapbooking supplies. I taped the scrapbook paper to the large sheet of paper that came in the frame so they wouldn't slide around when I hung the frame up.
 I use a dry erase marker to write the date next to the day's letter so that I can always see a week ahead.

I love how this turned out and use it constantly to remind myself of all the events in my busy schedule!

Friday, August 24, 2012

Girl Scout activities

A friend asked me to use my Pinterest skills to come up with some ideas for her to use at a Girl Scout camp this summer. These are the things I made for her:

Egg Carton Scavenger Hunt - easy to make, especially since I have a laminator that I use for school so I was able to laminate the picture guide that goes on top of the egg carton. I would use this when babysitting or in my classroom as well as in Girl Scouts.

Velcro Sticks - I bought fat popsicle sticks and velcro dots from Walmart and put them together in a few minutes. I can think of so many uses for these, including spelling words or making letters, and using them as building tools in the block area of my classroom.

Balloon Bean Bags - these were not as easy to make as I was expecting. The balloon didn't want to stretch so it took forever to get the beans into it. I started with navy beans but they were too big and a pain to get into the balloon so I switched to lentils for the second one and then used couscous for the third one. I would use these as tactile/sensory tools in my classroom in addition to the obvious uses as a ball.

Felt Fishing Game - I cut two fish shapes from each color of felt, attached a sticky magnet to the middle of one of them, then sewed the two together with the magnet in the middle. I tied yarn around a magnet and attached it to a popsicle stick to make the fishing rod. These can be used for color recognition and sharpening motor skills. If you used puffy paint to write things on the fish it could also be used for recognizing anything from letters or shapes to sight words and names.

Scrap Finger Puppets - I have tons of fabric scraps so I was excited to see this pin! I used the felt scraps from the fishing game to make basic finger puppets, and then added puffy paint details for eyes and a mouth.

Sponge Splash Balls - These were a bit harder to make because I couldn't get the zip-ties to tighten enough. I ended up cutting each sponge length in half again to make smaller balls but it worked much better.

Fruit Matching Game - I love the graphics in this printable! All I did was print them, cut them out, and laminate them so they can be used for a long time.

I haven't had a chance to get feedback from my friend about how these items were received, but hopefully they went over very well!

Granola

I am a huge fan of granola, but it is so expensive! The BEST granola I've ever eaten was purchased at our local farmer's market from a boy who makes it with his mother. They have amazing flavors like blueberry cobbler, orange cranberry, and chocolate fudge. I decided that I would try to make my own granola instead of spending $4 every Wednesday at the farmer's market.

Since the orange cranberry was my favorite, I tried to find a similar recipe. HERE is what I decided on.
I've made it twice now, and both times it didn't get crunchy, even though the second time I left it in so long it started burning. It tastes alright when I eat it in a bowl with milk like cereal, but it doesn't even begin to compete with the granola from the farmer's market. I'm going to have to keep trying, or else trick the recipe out of the boy at the market! ;o)

Taco Cornbread Casserole

THIS recipe for Taco Cornbread Casserole is AMAZING!
My whole family loves it and I have also made it for a friend as a drop-in meal and it received rave reviews. The best part is, it is SO easy to make! I don't really have anything else to say about it, other than you HAVE to try it! :o)

Cowboy Meatloaf Casserole

Meatloaf is one of the staples at our house because it is on the short list of meals that everyone enjoys. THIS recipe for Cowboy Meatloaf Casserole interested me because it was a new way to present the same food.
I made my meatloaf the same way I always do and baked it in a larger casserole dish instead of in the bread loaf pan I usually use. It shrank away from the edges a bit but that didn't matter once I covered it with potatoes!
While the meatloaf was baking I boiled red potatoes and made mashed potatoes the way I usually do. (Have you ever added cream cheese to your mashed potatoes?! It makes a world of difference!)
When both were finished I spread the mashed potatoes over the meatloaf and topped it with crumbled bacon (which I had left over from a recipe the day before), sliced green onions, and shredded cheddar cheese.
I threw it back in the oven long enough for the cheese to melt and then cut it into squares to serve. We always eat meatloaf with BBQ sauce, but otherwise it was a meal all on it's own, plus some broccoli on the side. I will definitely be making this again!

To Do List Picture Frames

I have to admit that I am the queen of extremely long To Do lists. I'm great at writing them, but not so great at finishing the items on them! I saw lots of pins on Pinterest about using picture frames and dry erase markers to make cute, reusable To Do lists. I've also seen MANY pins about making felt flowers. I combined the two ideas to make this:

I used scrapbooking stickers to write "To Do" at the top of a piece of loose-leaf paper.

I used a glue gun to hot glue the paper into the back of the frame to make sure it didn't wiggle around. I also hot glued the felt flowers to the front of the frame. 

As you can see, I filled the frame with things to do in no time at all!

I liked the results so much that I decided to make a second frame for my desk at work. 


 This time I used purple cotton fabric to make rosettes by twisting and wrapping the fabric around itself. I hot glued it to a little cardboard circle so that it would stay in place, and then hot glued the whole thing to the frame.


 Finished products, already filled with things for me to do!


Felt Superhero Masks

Another one of my favorite little boys had a birthday this summer, so it was time to make some superhero masks! HERE is the pin where I got my inspiration. I tried to print out her templates a few times from different computers and it didn't work, so I set out making my own instead.
I grabbed a pad of graph paper and made a generic mask shape to start. I made sure the eyes were in the right place and that it was the right size. Then I used that shape as my template to individualize each superhero mask. I only made 5 of the 7 that were shown in the pin. I used regular crafting felt and elastic. I cut out all the pieces, attached the embelishments to the front piece, added the elastic, and then finished it with the back piece so that it looked clean and there were no scratchy seams on the part that touches your face. 

Here are the finished masks:


Iron Man

Batman

Spiderman

Wolverine

The Hulk

I'm really happy with how they turned out and hopefully A will spend many hours running around the yard with these masks on having crazy superhero adventures!

Cupcakes!

It was my aunt's birthday so I decided to make her some cupcakes. I am really not a baker so I was excited when I found THIS recipe on Pinterest that claimed to make a box cake mix taste like scratch. 
I had also seen THIS pin for edible glitter and wanted to try it out as an alternative to sprinkles. While I was at it, I found THIS pin for cream cheese frosting. 
Here is a picture of the three piles of "glitter" that were different shades of blue. It looked absolutely nothing like the picture in the pin...although I used sugar instead of salt considering I didn't want my cupcakes to taste gross! 
 Here are the cupcakes before frosting. They EXPLODED out of the muffin cups and I was really worried that they would crumble into a million pieces when I tried to pull them out, but they survived! Next time I should used THIS pin as a guideline for filling the tins.
The cupcakes were VERY light and airy...probably too light and airy for most people's liking. I personally prefer dense, moist cupcakes, and these were not. I don't think I'll be using this recipe again. Next time, I'll just stick to following the directions on the box. No need to pretend to be something it's not!


 The frosting was a bit of a disaster. I didn't pay attention to the fact that it was supposed to be a cinnamon roll frosting, which meant that it was a lot runnier than I was expecting. I didn't feel like frosting all the cupcakes with a knife because I am terrible at doing that, so I dumped all the frosting into a Ziploc bag, cut the corner off, and used it as an impromptu frosting bag to pipe the frosting onto the cupcakes. I'm glad I did because it gave some visual interest to the otherwise boring white frosting.

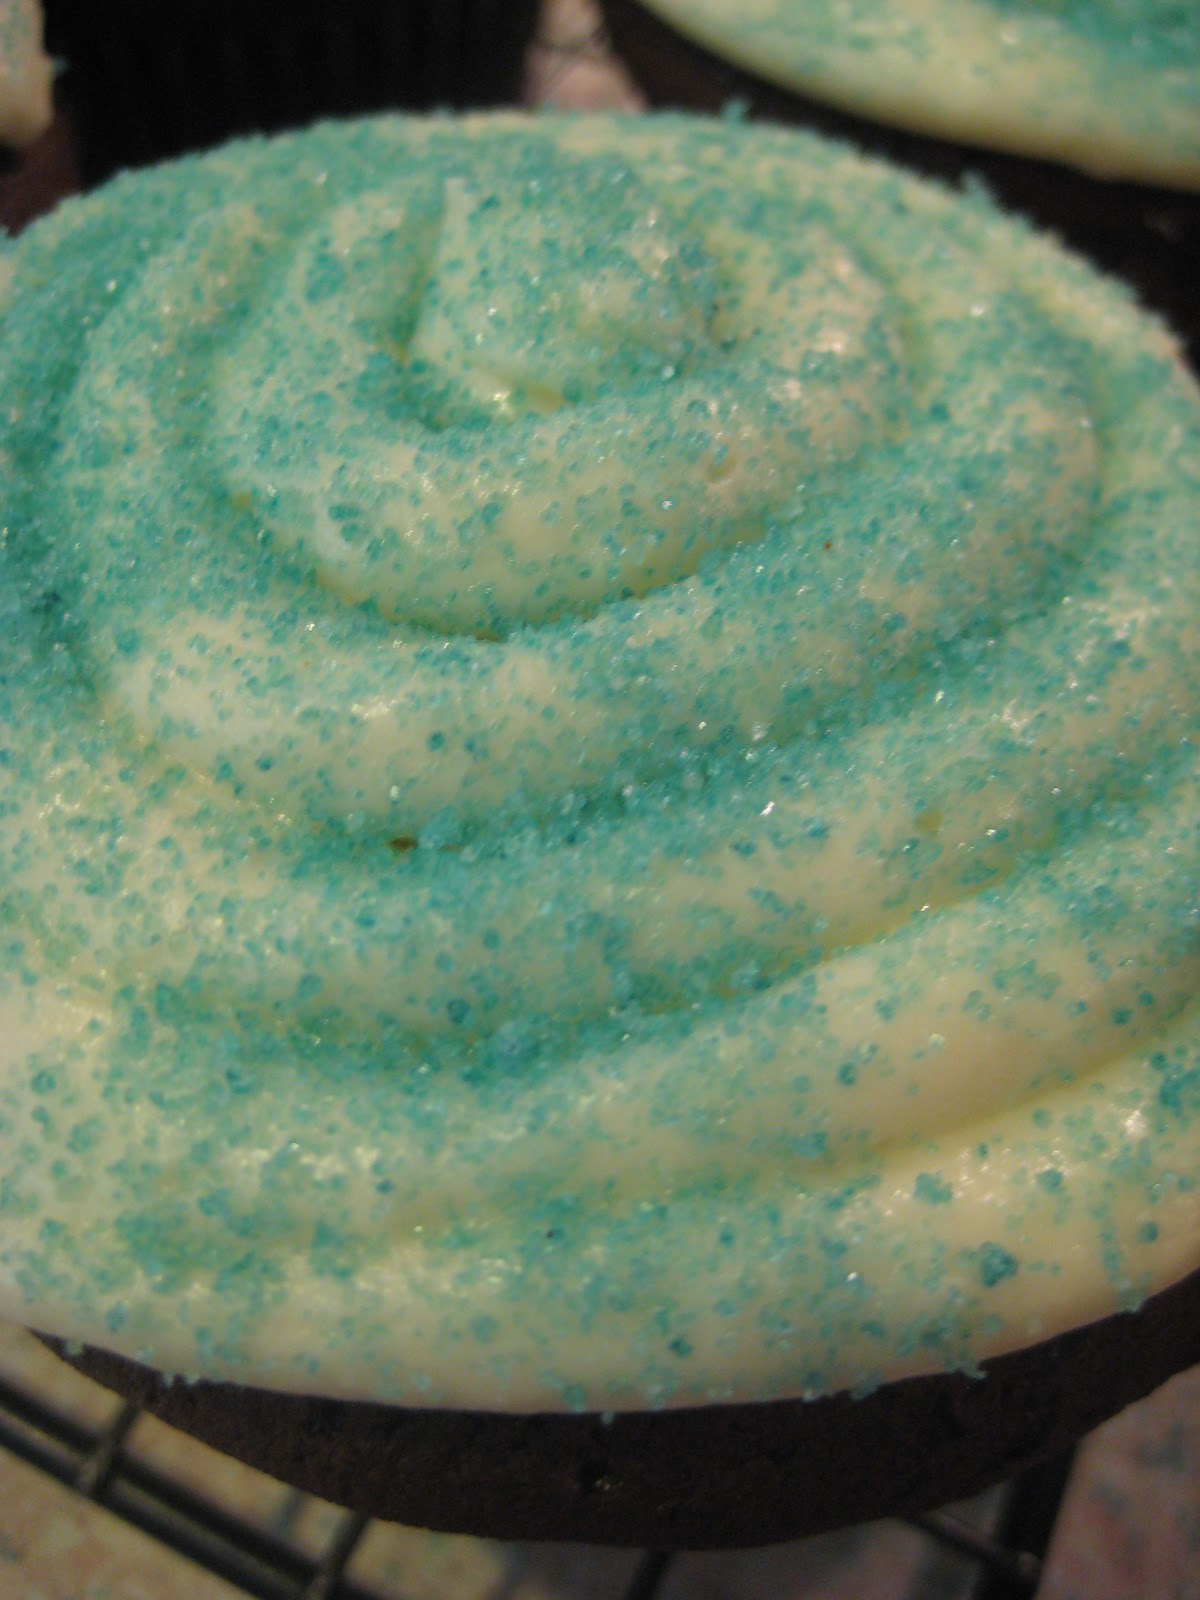
 Finally, I sprinkled the "glitter" onto the cupcakes. While it definitely didn't shine like I was expecting it to based on the terribly misleading picture in the pin, it basically looked like the sugar crystal sprinkles that you can buy at the store.
 Here are the three different shades of blue:


 You can see that the darker the color, the more chunky the sugar got...


Here's the ombre effect of the three different shades all on one tray:


YUM!

Mario and Luigi! (and Princess Peach, too!)

One of my favorite little boys was celebrating his birthday, so I made him these:

 I couldn't find a good pattern on Pinterest, so I turned to Google. After much searching, I came upon THIS blog. She didn't have a pattern that I could print out, so I just did my best without one. I used polar fleece fabric because it holds it's own shape better than cotton. I think they turned out really well! The Princess Peach crown was a bonus since I was sure T's little sister would want to be part of all the Mario Bros. action too!


Organized Art Supplies

I love organization! It seems like such a silly thing to say, but being a teacher and an avid crafter, I have a LOT of supplies that can get out of hand quickly of they aren't well organized. Inspired by my favorite organization blog, I Heart Organizing,  I recently reorganized my desk and craft supplies, and I used black contact paper and my Cricut machine to create labels for each drawer. (I apologize for the terrible picture quality!)


It was pretty labor intensive to peel the back off of each individual letter and then line them up carefully on each drawer, but I'm very pleased with the result!

soup!

I absolutely LOVE soup! THIS Spring Minestrone soup was one of the best soups I've ever made. I've made it twice already and will definitely be making it again. The process is a bit more involved since I made the meatballs in a frying pan and then added them to the soup, but since they had the nice crisp outsides it really added to the flavor and texture of the soup.
 
 I like my soups REALLY thick - the chunkier the better - so I used larger pasta to thicken it up.
 This was also the first time I'd cooked with leeks and I was very pleased with the results. YUM in every bite!


 THIS tomato pasta soup recipe caught my eye because it minced all the vegetables. I had never done that before and wanted to see what kind of texture would result. The picture below was what I packed in my lunch, and it lost a lot of liquid in the fridge overnight, so it doesn't really look like soup at all.
I wasn't a huge fan of the texture resulting from mincing all the veggies, but I would try making this soup again with regular veggies instead.

I also made THIS mushroom barley soup but forgot to take a picture of it. It was fantastic! I would note, though, that the blog mentioned saltiness being a factor to watch out for and I would definitely point it out again. It was a bit salty for me, and I cut back from what the recipe called for originally.

I can't wait for fall to really kick in so that I can try many more soup recipes! 

Baby Gifts!

So many people have been having babies lately, which gives me the excuse to make cute baby gifts! I forgot to take pictures of the girl items I made, but I'll post the links anyway.

Baby Jack got some fancy duds inspired by THIS pin:

It was really easy to make and I think it turned out really well!

He also got a couple spit rags made with wash cloths to really clean up the messes. I hate the burp cloths that are so thin they soak through in one use. These last so much longer!


Also, I apparently forgot to take pictures of the baby aprons I made out of the same monkey and shark material...I'm terrible, I know. THIS pattern is AWESOME and makes the best baby bib/apron I have seen. It covers so much more area, preventing that many more accidents.

Sweet Norah received similar burp cloths and baby aprons in girly fabrics, and she also received pacifier clips, a "chair anywhere" for when she gets a bit older, and a door jammer. I don't have pictures of any of these, of course, because I wrapped them before I remembered that I hadn't photographed them! The link to the door jammer is to an etsy site so there isn't a tutorial. I just made it up based on the picture and used hair elastics for the stretchy part. 
Overall these baby gifts have been very well received and they were relatively simple to make.